ClimbCal documentation
Everything you need to run your booking workflow
Set up your schedule, publish booking pages, coordinate your calendar, manage customers, and grow into team scheduling—all from one place.
 ClimbCal
Help center
ClimbCal
Help center
ClimbCal documentation
Set up your schedule, publish booking pages, coordinate your calendar, manage customers, and grow into team scheduling—all from one place.
Start here
A new workspace is ready to accept customers after you set bookable hours and publish at least one event type. Connecting a calendar and testing the public page are strongly recommended.
Open Availability, confirm your timezone and add at least one block of weekly hours. Select Save availability.
Open Calendar, connect Google Calendar or Microsoft Calendar, choose calendars that block times, and select a destination calendar.
Open Event types. Add a customer-facing title, description, location, duration, booking rules, and any guest questions.
Change its status to Active and select Save event type. Draft and paused events cannot accept new bookings.
Open the booking page, choose a time as a customer would, then copy its link or add it to your website.
Workspace
Overview is the home of your workspace. It shows setup progress and points you to the next required action.
The optional plan choice tailors the setup path; it does not charge you. Choose or change a paid subscription from Plan & billing.
Scheduling
An event type is an appointment customers can book, such as a consultation, lesson, or site visit. Each event has its own public page and scheduling rules.
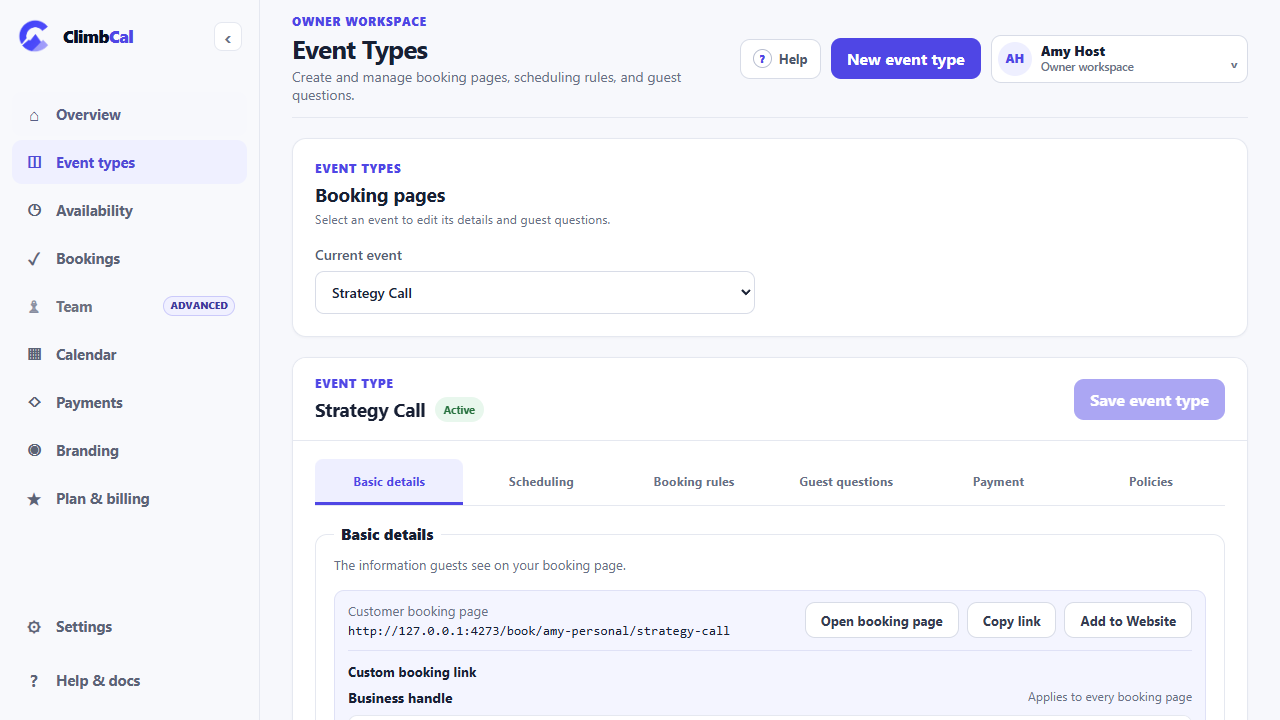
Set the title, status, description, and meeting address shown to customers.
Choose one or more duration options, the default duration, and the interval between offered start times. The event uses the timezone configured in Availability.
Control phone-number collection, minimum notice, booking window, daily booking limit, and buffer time before and after meetings.
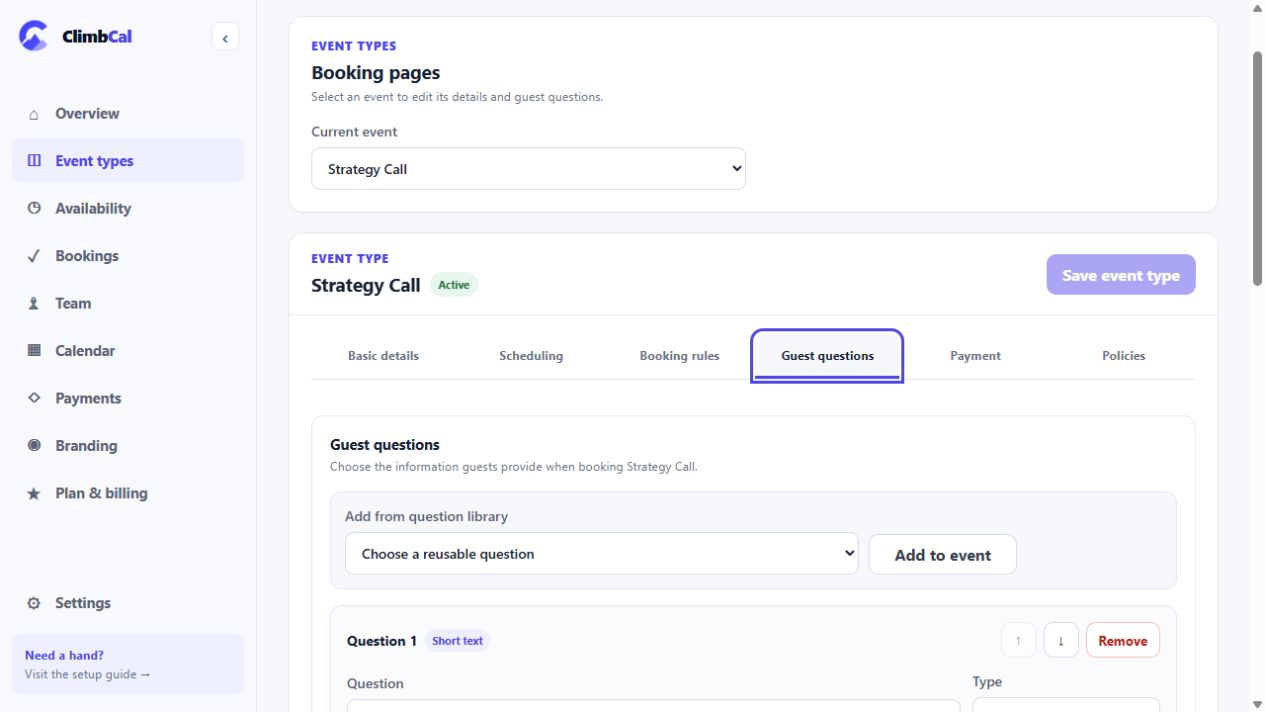
Collect extra information using short text, long text, dropdown, or confirmation questions. Questions can be required, reordered, previewed, and reused from the question library.
After connecting Stripe, choose no payment, full payment, or a fixed deposit. Enter the amount and currency the customer will see at checkout.
Add the cancellation and rescheduling expectations displayed to customers during booking.
The Basic details section provides actions to open the public page, copy its URL, and add it to a website. Standard and Advanced workspaces can customize both parts of the URL:
Scheduling
Availability defines when customers may book. Weekly hours create your regular schedule; date overrides change it for individual dates.
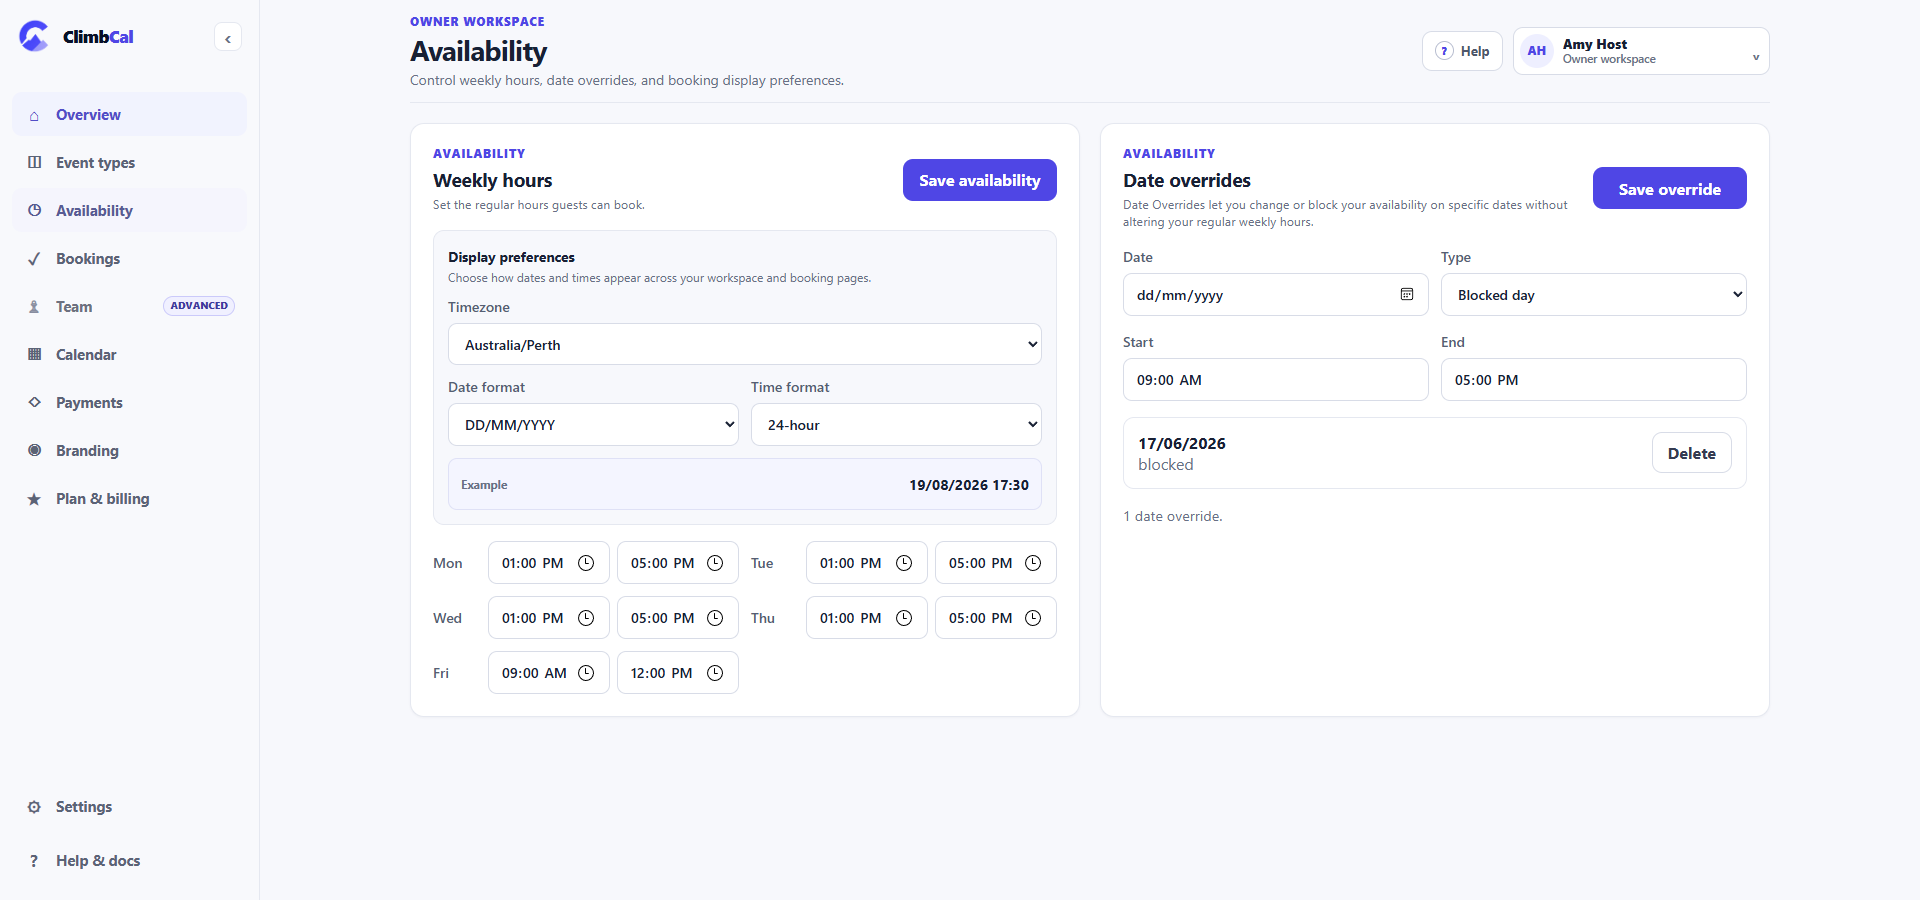
Multiple periods on the same day let you leave gaps such as a lunch break. The example under Display preferences previews your chosen date and time formats.
Choose the date and override type, enter times when applicable, and select Save override. Existing overrides appear below the form and can be deleted.
Scheduling
The Bookings screen is the operational record for appointments. Use the calendar for schedule context or the list for a compact chronological view.
Details include the customer, scheduled time, answers, lifecycle history, payments, notification delivery, and destination-calendar write status when available.
Enter a reason and select Cancel booking. The cancellation becomes part of the booking history.
Choose one of the currently available replacement times, add an optional reason, and select Reschedule.
Use Resend beside a notification to send it again. This is available on Standard and Advanced.
Workspace owners can refund the remaining Stripe amount. A refund does not cancel the booking; perform both actions when both are required.
If a destination calendar write failed, use the retry action after resolving the connection problem.
Select Refresh if a recently created or updated booking has not appeared yet.
Scheduling
Calendar connections protect your schedule from conflicts and add confirmed ClimbCal bookings to the calendar you choose.
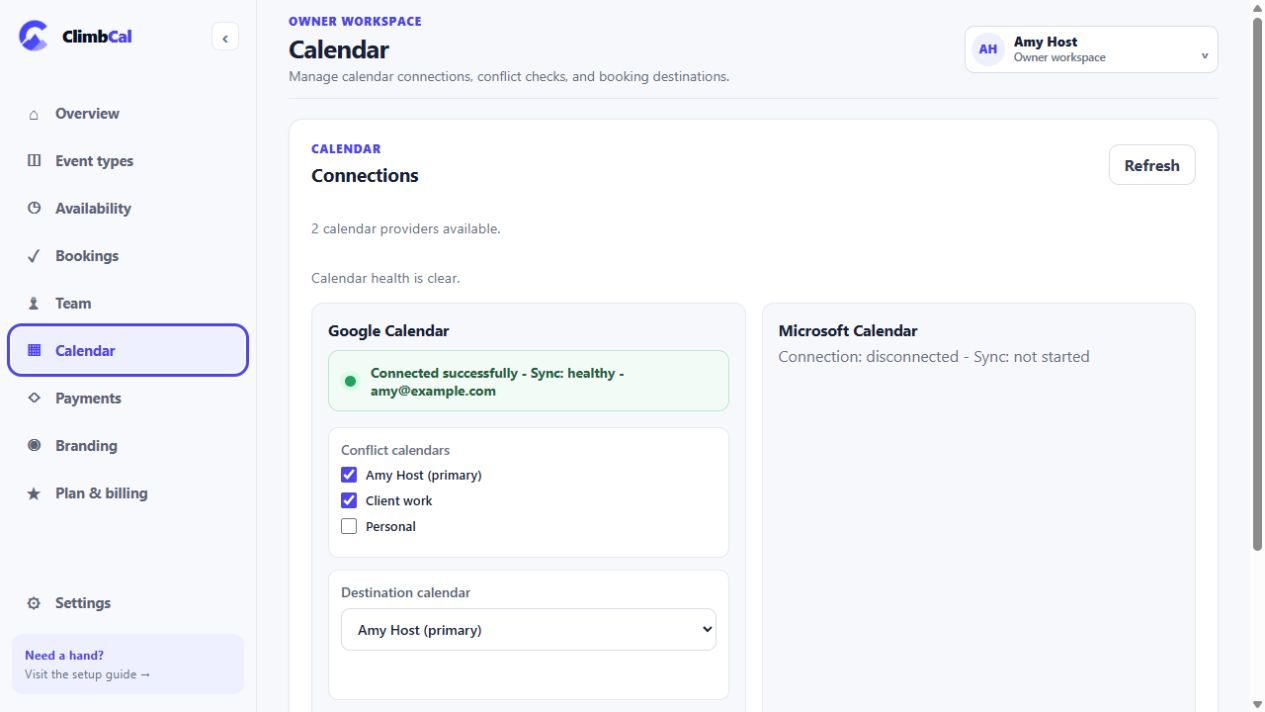
A calendar may be used for conflict checking, as the booking destination, or both. Additional connections and multiple conflict calendars depend on your plan.
Workspace
ClimbCal uses a connected Stripe account for customer booking payments. This is separate from the subscription that pays for ClimbCal itself.
Customers who choose a time for a paid event complete Stripe Checkout before the booking is confirmed. Payment activity and account diagnostics appear on the Payments screen.
Workspace
Advanced workspaces can invite multiple people, control workspace access, and route new bookings across active hosts.
Pending invitations expire after 14 days and reserve a paid seat. Cancel an unused invitation to release that seat.
Before enabling round-robin, make sure every selected member is active, has an available paid seat, and has configured availability. Select the members who should receive bookings, order them if required, and save the routing settings.
Workspace
Branding applies a shared company identity to every event type in the workspace.
The primary colour is used for buttons, selected times, links, and focus highlights. The page-background colour surrounds the booking experience. Enter a hex colour or use the picker; the live preview shows the result before saving.
ClimbCal checks the primary colour against white text for readable contrast. Adjust the colour if the form reports that it does not meet the required contrast.
Eligible plans can also hide “Powered by ClimbCal.” Select Reset to defaults to restore the original colours and attribution.
Booking confirmed, booking rescheduled, and booking cancelled emails automatically use the company logo, primary colour, page-background colour, and ClimbCal attribution setting saved above. Visual branding is shared across all three email types, while the message copy is customised separately for each type.
Choose an Email type, then configure the fields for that message:
Booking details, payment information, policy copy, and secure action links remain controlled by ClimbCal so they stay accurate.
Insert any of the variables shown below in the subject, introduction, or sign-off. ClimbCal replaces each variable with the booking’s value when it sends the email.
| Variable | Value |
|---|---|
{{guest_name}} | Customer name |
{{event_title}} | Event type title |
{{business_name}} | Workspace name |
{{start_time}} | Full booking date and time |
{{start_date_short}} | Booking date |
{{start_time_short}} | Booking time |
Workspace
The question library keeps commonly used customer questions ready to add to any event type.
Adding a library question copies it into the event. You can then adjust the event-specific version without changing the reusable source.
Workspace
Plan & billing shows the workspace’s current license, renewal or cancellation state, seat usage, and the plans available to purchase.
One active event, one host, limited monthly bookings and event questions, and one calendar connection.
Unlimited bookings and active events, advanced event rules, payments, branding, custom email notifications, embeds, custom links, reusable questions, and notification resend for one host.
Everything in Standard, plus multiple paid seats and round-robin routing.
The live plan cards are the source of truth for current pricing, currencies, intervals, and limits. Prices are per purchased user seat. Choose the seat quantity before checkout; pending invitations and active members both consume or reserve seats.
Reference
Customers do not need a ClimbCal account. They move from choosing an available time to providing their details and receiving confirmation.
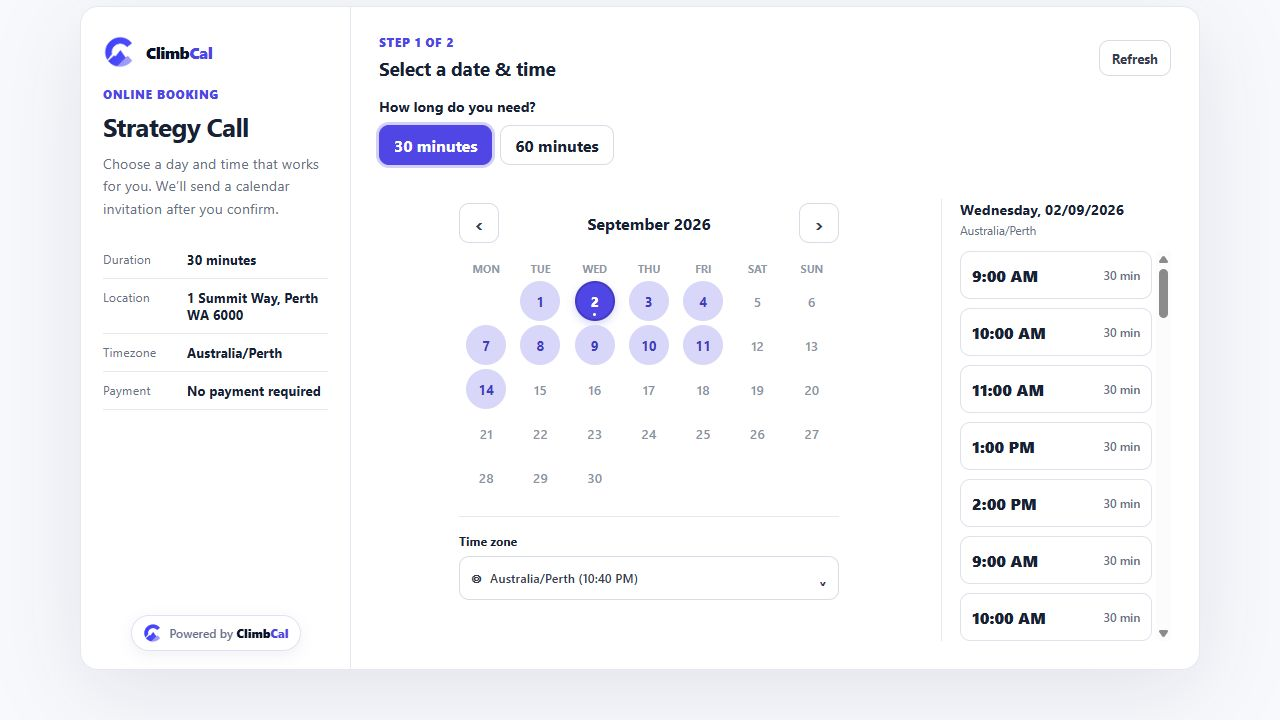
The customer chooses a duration, date, timezone, and available start time.
ClimbCal temporarily holds the time while the customer enters contact information, answers required questions, and acknowledges applicable policies.
For a paid event, Stripe Checkout collects the configured full amount or fixed deposit.
ClimbCal confirms the booking, writes it to the destination calendar, and sends lifecycle notifications when delivery is configured.
Confirmation messages contain secure, booking-specific links. A customer can cancel with a reason or choose a new available time. A reschedule rechecks availability before committing the new time.
Reference
Workspace roles determine who may make administrative changes. Plan entitlements still apply regardless of role.
| Capability | Owner | Admin | Member |
|---|---|---|---|
| Use the scheduling workspace | Yes | Yes | Yes |
| Manage workspace setup and event configuration | Yes | Yes | Limited |
| Manage branding and custom booking links | Yes | Yes | No |
| Customise email notifications | Yes | Yes | No |
| Invite, disable, or remove team members | Yes | Yes | No |
| Change the ClimbCal subscription | Yes | No | No |
| Refund booking payments | Yes | No | No |
| Close a Free workspace | Yes | No | No |
Controls you cannot use may be disabled or omitted. If you need additional access, contact the workspace owner.
Reference
Start with the symptom below, then refresh the affected screen after making a change.
Check that the event is Active, weekly availability has been saved, the requested date is inside the booking window, minimum notice has passed, and no date override blocks the day. Connected-calendar events, buffers, daily limits, existing bookings, and another customer’s temporary hold can also remove a time.
Confirm that the event status is Active and open the current URL from Event types. If you changed the business handle or event link, use the canonical link shown in ClimbCal. Historical links should redirect, but a typo or link belonging to another workspace will not.
Select Repair or reconnect the provider account, complete consent, reselect conflict and destination calendars, and save. Then review Calendar health and retry any failed destination writes.
Open the booking detail and inspect Calendar writes. Resolve any connection error, confirm the destination calendar is still selected, then use Retry. The ClimbCal booking remains the scheduling record even when a provider write needs attention.
Confirm the workspace is on Standard or Advanced, then check Payments for account, charges, and payouts readiness. Complete any outstanding Stripe requirements and make sure the event’s Payment mode, amount, and currency have been saved.
Confirm the token was copied completely, has not expired or already been accepted, and the workspace has a seat available. Pending invitations expire after 14 days and themselves reserve seats.
Read the status message beside the form and look for the event tab marked “needs attention.” Complete required fields, correct invalid times, amounts, colours, URLs, or question options, then save again.
Review the timezone, date format, and time format in Availability. The host schedule uses the workspace timezone while customers may view available times in their chosen timezone.
Open Booking detail to inspect delivery status. Standard and Advanced workspaces can select Resend. Resending creates another delivery attempt; it does not change the booking itself.
Reference
Use the account menu in the top-right corner to review your identity and role or sign out.
ClimbCal retains a closed Free workspace for 30 days. Sign in during that period and choose Reactivate workspace to restore access to its settings, event types, and bookings. After the retention period, its data is permanently deleted.
Cancellation continues in the secure billing portal. The paid plan normally remains available until the end of the current billing period, and ClimbCal shows the effective date in Plan & billing.
Try a feature name such as “calendar,” “refund,” “availability,” or “team.”